
Kitchen islands are often the heart of the home. They're where we prepare food, gather for casual meals, and chat with family and friends. The right lighting above your island isn't just functional - it sets the mood and completes the look of your kitchen.
But one question comes up again and again: How high should you hang those pendant lights?
This guide will walk you through everything you need to know. We'll cover the standard guidelines, the crucial factors that require adjustments (especially your ceiling height!), and practical tips to help you hang your island lights perfectly for both function and style.
Standard Height Golden Rule
Most designers and lighting professionals agree on a standard starting point for hanging pendants over a kitchen island.
The Guideline: Aim to hang your pendant lights so the bottom of the fixture is 30 to 36 inches (76 to 91 cm) above the countertop.
Why this range?
- Good Task Lighting: This height is generally low enough to effectively illuminate your island workspace for tasks like chopping vegetables or reading recipes.
- Clear Sightlines: It's typically high enough to keep the fixtures out of your direct line of sight when you're standing or sitting at the island, allowing for easy conversation across the space.
- Headroom: It usually provides enough clearance to avoid bumping your head.
This 30-36 inch (76-91 cm) range is a great baseline, especially for standard 8-foot (244 cm) ceilings.

Height Adjusting For Specific Kitchen
While 30-36 inches (76-91 cm) is a solid starting point, it's not a one-size-fits-all rule. Several factors in your kitchen might mean you need to adjust that height. Getting these adjustments right is key to a professional look and feel.
1. Ceiling height (the most important factor!)
This is the biggest reason to adjust from the standard guideline. The goal is to keep the light fixture feeling proportionally balanced between the countertop and the ceiling.
Standard 8-Foot (244 cm) Ceilings
The 30-36 inch (76-91 cm) rule generally works well. No major adjustment needed.
Taller Ceilings (Above 8 Feet/244 cm)
If you stick to the 30-36 inch (76-91 cm) rule with high ceilings, the pendants can look awkwardly short, with too much empty chain or cord space above them.
The rule of thumb for higher ceilings is simple:
Add 3 inches (7.6 cm) to your pendant height for each additional foot (30.5 cm) of ceiling height.
Example: For a 9-foot (274 cm) ceiling, aim for 33-39 inches (84-99 cm) above the counter (30-36" + 3").
Here's a quick reference table:
| Ceiling Height | Recommended Pendant Height (from countertop) |
|---|---|
| 8 feet (244 cm) | 30-36 inches (76-91 cm) |
| 9 feet (274 cm) | 33-39 inches (84-99 cm) |
| 10 feet (305 cm) | 36-42 inches (91-107 cm) |
| 11 feet (335 cm) | 39-45 inches (99-114 cm) |
| 12 feet (366 cm) | 42-48 inches (107-122 cm) |
Lower Ceilings (Below 8 Feet/244 cm)
Stick towards the lower end of the standard range (around 30-32 inches/76-81 cm) to maximize headroom and prevent the space from feeling too crowded.

2. Task lighting vs. visual clearance
Think about how you use your island most.
If you do a lot of detailed work (baking, prep work), you might lean towards the lower end of your calculated range for more focused light.
If the island is mainly for seating and socializing, ensure the lights are high enough not to block conversations or feel intrusive. Find the balance that works for your needs.
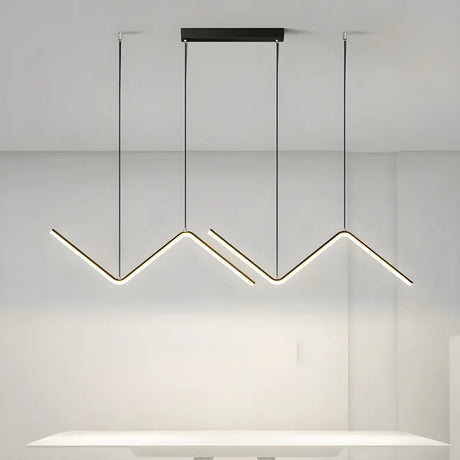
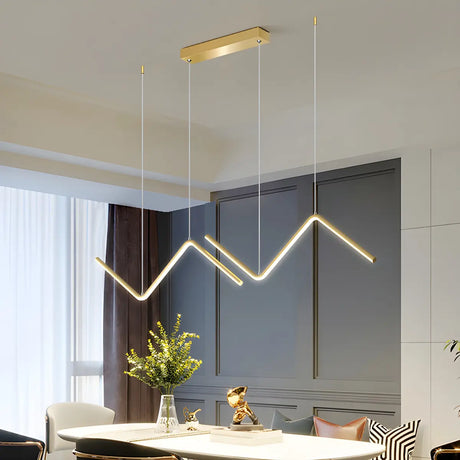
3. Fixture size and scale
The size of the pendant light relative to the island is important. While there are no hard and fast rules that relate size directly to height, very large or visually heavy fixtures are best hung slightly higher within the calculation to avoid taking up too much space.
Tips: Look at photos of islands similar in size to yours. Pay attention to the scale of the pendants used and how high they are hung. This helps you judge what looks balanced.
4. User height
Consider the people using the kitchen. If members of your household are particularly tall, make sure the bottom of the fixtures is high enough for comfortable headroom when standing or working at the island. Opting for the higher end of your calculated range might be wise.
5. Aesthetics and overall style
Ultimately, pendant height also influences the room's style.
If you prefer to create a stronger visual effect or focal point, consider hanging the pendant slightly lower. On the other hand, if you prefer a more open, airy feel, hang the chandelier higher.
Summary table
Here's a quick table summarizing the main adjustment factors:
| Factor | Guideline / Rule | Key Consideration / Why it Matters |
|---|---|---|
| Ceiling Height | Base: 30-36" (76-91 cm) for 8ft ceiling. Add ~3" (7.6 cm) for each foot (30.5 cm) above 8ft. | Maintains visual proportion; avoids lights looking lost |
| Task Lighting | Lower end of range favors focused light. | Ensure adequate light for specific tasks. |
| Visual Clearance | Higher end of range favors open sightlines. | Avoid blocking views or creating glare. |
| Fixture Size | Consider scale relative to island; larger fixtures might suit slightly higher. | Prevent fixtures looking overwhelming or insignificant. |
| User Height | Ensure sufficient headroom for tall individuals. | Comfort and safety (avoiding head bumps). |
| Aesthetics | Height impacts visual focus and overall style. | Achieve the desired look and feel for your kitchen. |
Remember, these factors often work together. Use the ceiling height rule as your main calculation, then fine-tune within that adjusted range based on task needs, fixture size, user height, and your personal style preference.
Installation Layout - Number, Spacing, And Centering

Once you've determined the ideal height range for your pendants, the next step is figuring out where exactly to place them over your island. Proper layout is just as important as height for achieving balanced lighting and a polished look.
How many pendants do you need?
There's no single right answer, as it depends on:
- Island Length: Longer islands generally need more lights.
- Fixture Size: Fewer large pendants might be needed compared to multiple smaller ones.
- Desired Look: Some people prefer fewer, bolder statements, while others like a row of smaller lights.
Common Guidelines:
- Small Islands (around 5-6 feet/152-183 cm long): Two pendants often work well.
- Medium to Large Islands (7 feet/213 cm or longer): Three pendants are a popular choice. This often follows the "Rule of Three," a design principle suggesting that items grouped in threes are visually appealing. Larger islands might even accommodate four or more smaller pendants.
- Odd Numbers: Often preferred for visual balance, especially when using three or more lights.
How to space your pendants correctly?
Proper spacing ensures even light distribution and prevents the layout from looking cluttered or sparse. There are two key measurements:
1. Spacing between fixtures
Aim for 24 to 32 inches (61 to 81 cm) between the center points of each pendant light. A common recommendation is around 30 inches (76 cm). This helps spread the light evenly across the island surface.
2. Spacing from island ends
Leave at least 6 to 12 inches (15 to 30 cm) of space between the outer edge of the end pendants and the edge of the island countertop at each end. This prevents the lights from feeling like they're falling off the ends and frames the arrangement nicely.
How to center the pendant light?
For most kitchens, a symmetrical layout provides the best visual balance. Here's how to calculate placement:
Always center pendants width-wise: Ensure the line of pendants runs directly down the center of the island's width.
For Two Pendants
- Measure the total length of your island countertop.
- Divide the length by 4. Let's call this distance 'X'.
- Position the center of each pendant 'X' distance away from its respective island end.
Example: For a 72-inch (183 cm) island: 72 / 4 = 18 inches (46 cm). Place the center of each light 18 inches (46 cm) from each end. The space between their centers will be 36 inches (91 cm) (72 - 18 - 18).
For Three Pendants
- Find the exact center point of your island's length. Mark this spot.
- Place the center of your middle pendant directly over this center point.
- Decide on your desired spacing between pendants (e.g., 30 inches/76 cm).
- Measure out this distance from the center of the middle pendant to the left and right to mark the center points for the other two pendants.
Double Check: Ensure the distance from the outer pendants to the island ends is roughly equal and looks balanced (ideally at least 6-12 inches/15-30 cm).
Summary: island pendant layout rules
This table summarizes common layout approaches:
| Scenario | Common Method / Formula | Example (72" Island) | Key Goal |
|---|---|---|---|
| Spacing | 24-32" (61-81 cm) between centers; 6-12" (15-30 cm) min. from ends to outer edge of fixture. | Aim for ~30" (76 cm) between centers; ensure >6" (15 cm) end clearance. | Even light, balance |
| 2 Pendants | Island Length (L) / 4 = Distance (X) from each end to pendant center. | 72" (183 cm) / 4 = 18" (46 cm). Place centers 18" (46 cm) from each end. | Symmetry |
| 3 Pendants | Center the middle pendant. Place others equally spaced (e.g., 24-32"/61-81 cm) on each side. | Center middle at 36" (91 cm). Place others at 36"-30"=6" (15 cm) and 36"+30"=66" (168 cm) (if using 30" spacing). Check end clearance (6"). | Symmetry, Evenness |
Pro Tips For A Flawless Installation

You've figured out the height and the layout - now for the installation itself. Here are some practical tips:
Measure accurately
Double-check all your measurements before drilling any holes! Measure the island, ceiling height, and your fixtures.
Keep them level
When installing multiple pendants, ensure they all hang at the exact same height. A useful trick is to measure from the floor up to the bottom of the first correctly installed pendant, then use that measurement to set the height for the others.
Choose adjustable fixtures
Pendants with adjustable cords or rods make life much easier. They allow for fine-tuning the height after installation.
Follow manufacturer instructions
Always prioritize the specific instructions that come with your light fixtures for safe and secure installation. Electrical work should be done carefully and according to code. If unsure, hire a qualified electrician.
Use visual aids
Before committing, try using painter's tape on the ceiling to mark potential locations or even hang temporary strings with paper cutouts representing your pendants. This helps you visualize the final placement and height.
Watch installation videos
If you're doing this yourself, watching a few online tutorials for pendant light installation can provide helpful visuals and boost your confidence.
Plan for wiring
Ensure your electrical junction boxes are located correctly for your desired pendant layout before you start drywalling or finishing the ceiling.
Conclusion
Choosing and installing kitchen island lighting doesn't have to be complicated. By understanding the standard height guidelines, knowing how to adjust for factors like ceiling height, and carefully planning your layout, you can achieve fantastic results.
Remember the key steps:
- Start with the 30-36 inch (76-91 cm) guideline (countertop to bottom of fixture).
- Adjust primarily based on ceiling height (add ~3 inches/7.6 cm per foot/30.5 cm over 8ft).
- Fine-tune based on fixture size, task needs, and aesthetics.
- Plan your layout carefully for number, spacing, and symmetry.
Taking the time to get these details right will reward you with island lighting that is not only perfectly functional for all your kitchen tasks but also beautifully enhances the overall style and feel of your space. You've got this!
FAQ
What is the standard height to hang kitchen island pendants?
What is the standard height to hang kitchen island pendants?
The general guideline is to hang pendant lights so the bottom of the fixture is 30 to 36 inches above the surface of your kitchen island countertop.
How do I adjust island light height for a tall ceiling?
How do I adjust island light height for a tall ceiling?
For ceilings taller than the standard 8 feet, you should hang the pendants higher to maintain visual balance. A common rule is to add about 3 inches to the hanging height (from the countertop) for every additional foot of ceiling height above 8 feet.
How many pendants do I need for my kitchen island?
How many pendants do I need for my kitchen island?
This depends on your island's length and the size of the lights. Typically, two pendants work well for smaller islands (around 5-6 ft), while three or more are often used for larger islands (7 ft+). Odd numbers (like three) are often considered visually pleasing.
How far apart should island pendant lights be spaced?
How far apart should island pendant lights be spaced?
Aim for 24 to 32 inches between the center points of each pendant. Also, ensure the outer edge of the pendants at each end are at least 6 to 12 inches away from the edge of the island countertop.
Does the size or style of the pendant light affect the hanging height?
Does the size or style of the pendant light affect the hanging height?
While ceiling height is the main factor for calculation, fixture size matters for visual scale. Very large or heavy-looking pendants might look better positioned slightly higher within your calculated range. Always consider how the fixture looks in proportion to your island and overall kitchen style.
Should I install a dimmer switch for my island lights?
Should I install a dimmer switch for my island lights?
Yes, using a dimmer switch for island pendants is highly recommended. It provides great flexibility, allowing you to adjust brightness for specific tasks (like food prep) or create softer mood lighting when needed.